Installing Ed-Fi ODS / API 5.3 with TPDM-Community v1.1
- Steven Arnold
- Chris Moffatt (Deactivated)
This section describes how to set up the Ed-Fi ODS / API for Suite 3 v5.3 with TPDM-Community v1.1 in a Windows environment using released binaries.
The steps can be summarized as:
Detail on each step follows.
Step 1. Install and Configure Windows Components
Ensure that the following components are installed:
- PowerShell 5.0. PowerShell is used to initialize the development environment.
- .NET Core 3.1.301 SDK. The .NET Core 3.1 Software Developer Kit is required for compiling the solution.
- .NET Core Hosting Bundle 3.1.x The .NET Core 3.1 ASP.NET Hosting Bundle is required for running the ODS / API
- Internet Information Services. IIS is the web server that will run the ODS / API.
PowerShell 5.0
Verify that PowerShell 5.0 or above is installed:
- Press the Windows key
on your keyboard, type PowerShell, select Windows PowerShell, and press Enter.
- Type $PSVersionTable.PSVersion, and press Enter.
- If the required version is not installed, download Windows Management Framework 5.0, which includes PowerShell 5.0.

.NET CORE 3.1 SDK
Download and install .NET Core SDK 3.1.301 (Compatible with Visual Studio 2019).

.NET CORE 3.1 Hosting Bundle
Download and install ASP.NET Hosting Bundle

Internet Information Services
- Press the Windows key
- Check the box next to Internet Information Services. The default selections will be good for most cases. Make sure that ASP.NET 4.8 is selected.
- Click OK.

Step 2. Install and Configure Required Software
Ensure that the following software is installed and configured:
- Microsoft SQL Server 2016 or 2017. Microsoft SQL Server is used to store the data for the Ed-Fi ODS / API. Local installation of Standard, Developer, or Enterprise Editions with Service Pack 2 or higher are supported.
- Optional PostgreSQL datastore:
PostgreSQL 11.x. PostgreSQL can be used as the datastore for and Ed-Fi ODS / API instance instead of Microsoft SQL Server.
Microsoft SQL Server 2016 or 2017
Install Microsoft SQL Server 2016:

- When prompted, select the following features:

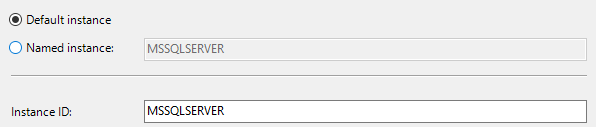
- Use the default instance named MSSQLSERVER.
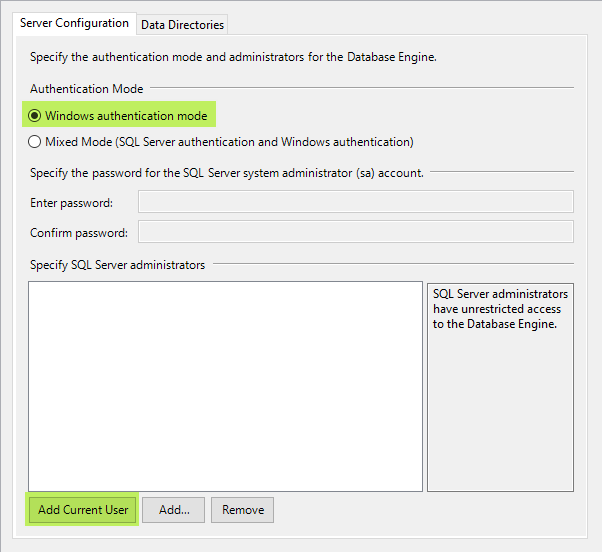
Select either Windows Authentication Mode or Mixed Mode.
- In Specify SQL Server administrator, click Add Current User.
Install SQL Server Management Studio:

PostgreSQL Installation (Optional)
Install PostgreSQL 11.x on port 5432 if you intend to use PostgreSQL as a backing datastore for the ODS / API.
PostgreSQL Visualization Tool
Unlike SQL Server, PostgreSQL does not include a GUI to visualize the database (commands are executed via the command line using psql). Below is a list of various tools that work:
Install PostgreSQL
Installation of PostgreSQL can be done either using the binaries or using Docker. The recommended solution is to to use the docker install using Linux containers.
Option 1. Installation using PostgreSQL Installer
- Install using the PostgreSQL installer. Version 11.x is compatible with the ODS / API.
- Note the installer includes pgAdmin as an option.
- The PostgreSQL installation guide has details.

Download the version 11.x installer.

Click Next.

Click Next.

If you want to install only the tools uncheck PostgreSQL Server, pgAdmin 4 and Stack Builder.
Click Next.

Click Next.

Enter a password for the postgres superuser.
Click Next.

Enter port 5432 (default).
Click Next.

Click Next.

Click Next.

Click Next to finish the installation.
Option 2. PostgreSQL Installation with Docker
Configure pgpass.conf
Create a pgpass.conf file. Note that the password should be your postgres superuser password and it should match the password in your environment file.
localhost:5432:*:postgres:P@ssw0rd
Set the environment variable PGPASSFILE to the location of the pgpass file that was created, which is the recommended approach. Optionally, the file can be saved in %APPDATA%/postgresql/pgpass.conf.

You can test the environment variable setup using:
C:\> get-item env:pgpassfile

Name                           Value
----                           -----
PGPASSFILE                     C:\PGDockerSetup\pgpass.conf
Step 3. Download the Ed-Fi ODS / API Installer Packages
The Ed-Fi ODS / API installation packages can be downloaded from the following links:
Package Links
The required release packages to install the Ed-Fi ODS / API can be found at the links below. We recommend you to stay current with the latest patch update that has been promoted to release.
- EdFi.Suite3.Installer.WebApi
- EdFi.Suite3.Installer.SwaggerUI (Optional, not for production)
- EdFi.Suite3.RestApi.Databases
- EdFi.Suite3.Ods.Extensions.TPDM.Community.1.1.0
For each of the downloads, right-click and select "Properties." Update the file extension (from .nupkg to .zip). Remove the version number (optional). Check the box next to Unblock (this will prevent Powershell from asking for permission to load every module in the installer) and click OK.

You may need to configure TLS while running the installation scripts described in steps below.[Net.ServicePointManager]::SecurityProtocol += [Net.SecurityProtocolType]::Tls12
Step 4. Install the Ed-Fi Databases
Extract the contents of the EdFi.Suite3.RestApi.Databases package. The paths in these instructions assume that the package was extracted to a folder with the name of the package (e.g., C:\temp\EdFi.Suite3.RestApi.Databases).
Download and install the TPDM Database Deployment Scripts
Download the minimal and populated scripts for your chosen database engine (MS SQL Server or PostgreSQL) and copy them to the Ed-Fi-ODS-Implementation\DatabaseTemplate\Scripts folder of the EdFi.Suite3.RestApi.Databases extracted above
SQL Server: Populated Template Script Minimal Template Script
PostgreSQL: Populated Template Script Minimal Template Script
Edit the configuration.json File
There are several settings in the configuration file that are left empty as they depend on whether you are opting of SQL Server or PostgreSQL backend. Update the settings by consulting the samples provided below.
 "ConnectionStrings": {
     "EdFi_Ods": "server=(local);trusted_connection=True;database=EdFi_{0};Application Name=EdFi.Ods.WebApi",
     "EdFi_Security": "server=(local);trusted_connection=True;database=EdFi_Security;persist security info=True;Application Name=EdFi.Ods.WebApi",
     "EdFi_Admin": "server=(local);trusted_connection=True;database=EdFi_Admin;Application Name=EdFi.Ods.WebApi",
     "EdFi_Master": "server=(local);trusted_connection=True;database=master;Application Name=EdFi.Ods.WebApi"
  },
  "ApiSettings": {
  "Mode": "SharedInstance",
  "Engine": "SQLServer",
  "MinimalTemplateScript": "TPDMCommunityMinimalTemplate",
  "PopulatedTemplateScript": "TPDMCommunityPopulatedTemplate",
   ...
  }
 "ConnectionStrings": {
   "EdFi_Ods": "host=localhost;port=5432;username=postgres;database=EdFi_{0};Application Name=EdFi.Ods.WebApi",
   "EdFi_Security": "host=localhost;port=5432;username=postgres;database=EdFi_Security;Application Name=EdFi.Ods.WebApi",
   "EdFi_Admin": "host=localhost;port=5432;username=postgres;database=EdFi_Admin;Application Name=EdFi.Ods.WebApi",
   "EdFi_Master": "host=localhost;port=5432;username=postgres;database=postgres;Application Name=EdFi.Ods.WebApi"
  },
  "ApiSettings": {
  "Mode": "SharedInstance",
  "Engine": "PostgreSQL",
  "MinimalTemplateScript": "PostgreSqlTPDMCommunityMinimalTemplate",
  "PopulatedTemplateScript": "PostgreSqlTPDMCommunityPopulatedTemplate",
   ...
  }
Edit the Plugin section of the configuration file and update the Folder and Scripts values to the following:
"Plugin": {
    "Folder": "../../Plugin",
    "Scripts": [
    ]
  }
Extract the contents of the TPDM-Community package downloaded in step 3 and place the extracted folder in the Ed-Fi-ODS-Implementation\Plugin folder of the EdFi.Suite3.RestApi.Databases
Open a PowerShell window in Administrator mode and navigate to the EdFi.Suite3.RestApi.Databases package folder and run the following Powershell command to load modules for installationRun Installation Script
Import-Module .\Deployment.psm1
Finally execute the following command in PowerShell:
Initialize-DeploymentEnvironment
Step 5. Install WebApi
Extract the contents of the EdFi.Suite3.Installer.WebApi package. The paths in these instructions assume that the package was extracted to a folder with the name of the package (e.g., C:\temp\EdFi.Suite3.Installer.WebApi).
Prepare Installation script
Open a PowerShell window in Administrator mode and navigate to the EdFi.Suite3.Installer.WebApi package folder and run the following Powershell command to load modules for installation:
Import-Module .\Install-EdFiOdsWebApi.psm1
The WebApi installer can take a number of parameters to tailor the install experience (more examples can be found in the Install-EdFiOdsWebApi.psm1 file. At a minimum, database connection info is required. Copy and modify the following parameter code to fit your connection information.
$parameters = @{
    PackageVersion = "5.2.14406"
    DbConnectionInfo = @{
        Engine="SqlServer"
        Server="localhost"
        UseIntegratedSecurity=$true
    }
    InstallType = "SharedInstance"
}
Paste the modified parameter code into your PowerShell window and hit enter.
Run the Installation Script
Run the following command in the PowerShell window.
Install-EdFiOdsWebApi @parameters
Copy the TPDM-Community package folder into C:\inetpub\Ed-Fi\WebApi\plugins, delete any existing TPDM plugin in the plugins folder.
Enable tpdm in appsettings.json
Open the appsettings.json file found in C:\inetpub\Ed-Fi\WebApi.
Edit the Plugin section of the configuration file and update the Folder and Scripts values to the following:
"Plugin": {
    "Folder": "./Plugin",
    "Scripts": [
      "tpdm"
    ]
  },
Step 6. Install Swagger
Extract the contents of the EdFi.Suite3.Installer.SwaggerUI package. The paths in these instructions assume that the package was extracted to a folder with the name of the package (e.g., C:\temp\EdFi.Suite3.Installer.SwaggerUI).
Prepare Installation Script
Open a PowerShell window in Administrator mode and navigate to the EdFi.Suite3.Installer.SwaggerUI folder and run the following Powershell command to load modules for installation:
Import-Module .\Install-EdFiOdsSwaggerUI.psm1
The Swagger UI installer can take a number of parameters to tailor the install experience (more examples can be found in the Install-EdFiOdsWebApi.psm1 file). At a minimum, WebAPI connection information is required. Copy and modify the following parameter code to add your site name.
$parameters = @{
    PackageVersion = "5.2.14406"
    WebApiVersionUrl = "https://YOUR_SITE_OR_SERVER_NAME_HERE/WebApi"
}
Paste the modified parameter into your PowerShell window and execute the code.
Run the Installation Script
Run the following command in the PowerShell window:
Install-EdFiOdsSwaggerUI @parameters
Step 7. Install Admin App
Admin App v2.2.1 or higher is required for TPDM support
The Admin App provides a graphical interface for platform hosts to administer and manage non-sandbox instances of the Ed-Fi ODS / API. Follow the installation steps here. Alternatively, API keys and secrets can be administered by database administrators via SQL queries as outlined in the article How To: Configure Key / Secret.
Step 8. Restart your Website
- Open IIS (Press the Windows key
- Right-click on the server (alternatively, you can right-click the EdFi web site), and select Stop.

- Right-click the server (or EdFi website) again and select Start.

You are now ready to use the Ed-Fi ODS/API. The following URLs are available:
| Website | URL |
|---|---|
| Ed-Fi ODS/API | https://YOUR_SERVER_NAME_HERE/WebApi/data/v3 |
| Ed-Fi ODS/API Documentation | https://YOUR_SERVER_NAME_HERE/SwaggerUI |
The following link contains sample docker setup files for PostgreSQL
PGDockerSetup.zip